The quick read — 60 seconds
- A free MAGNET4WATER account is all you need. Go to
magnet4water.net, click Sign Up, fill in the form (name, email, password, organization), confirm your email. Total time: under two minutes. - Once logged in, click Platform in the top navigation to enter IGW-NET. You'll see a web map covering most of the screen and a toolbar on the left with four panel groups.
- The four toolbar panels follow the modeling workflow: Conceptual Model Tools (draw things), Simulation Tools (run the model), Analysis Tools (look at results), File Tools (save, open, publish).
- Your models are saved to your account — accessible from any browser, any device. You can also download files locally and publish models to the public MAGNET4WATER Observatory.
2.1 Creating an Account
If you don't already have a MAGNET4WATER account, this takes about two minutes. If you do, skip to §2.2.
2.1.1 Step by step
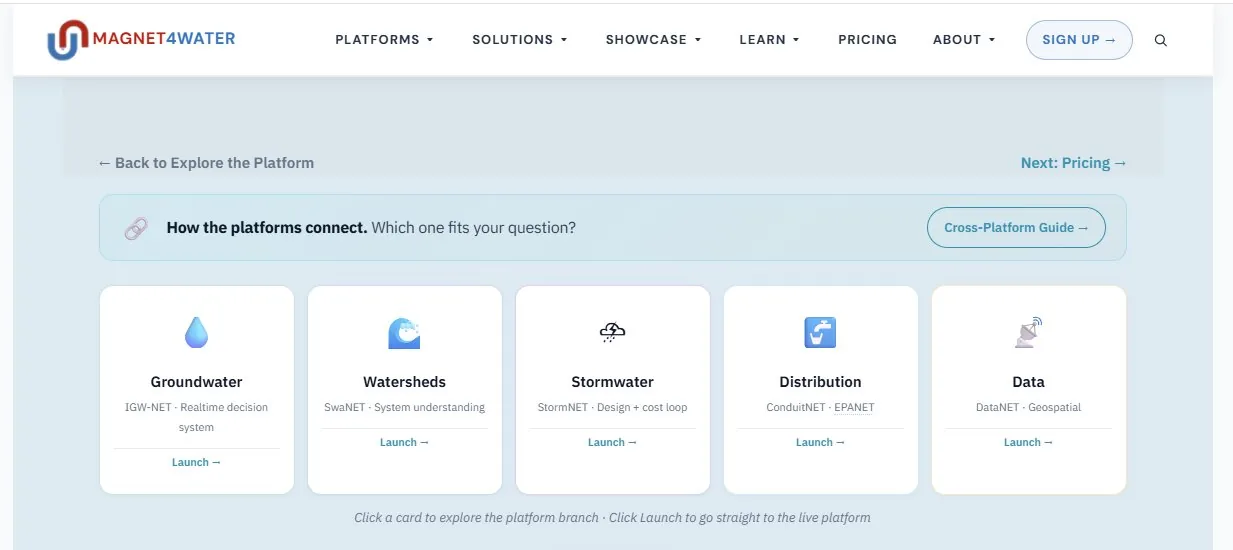
Go to magnet4water.net
Open a web browser and type magnet4water.net in the address bar. You'll land on the homepage shown in Figure 2.1.
Click Sign Up
Look for the Sign Up button in the top-right corner. Click it to open the registration page.
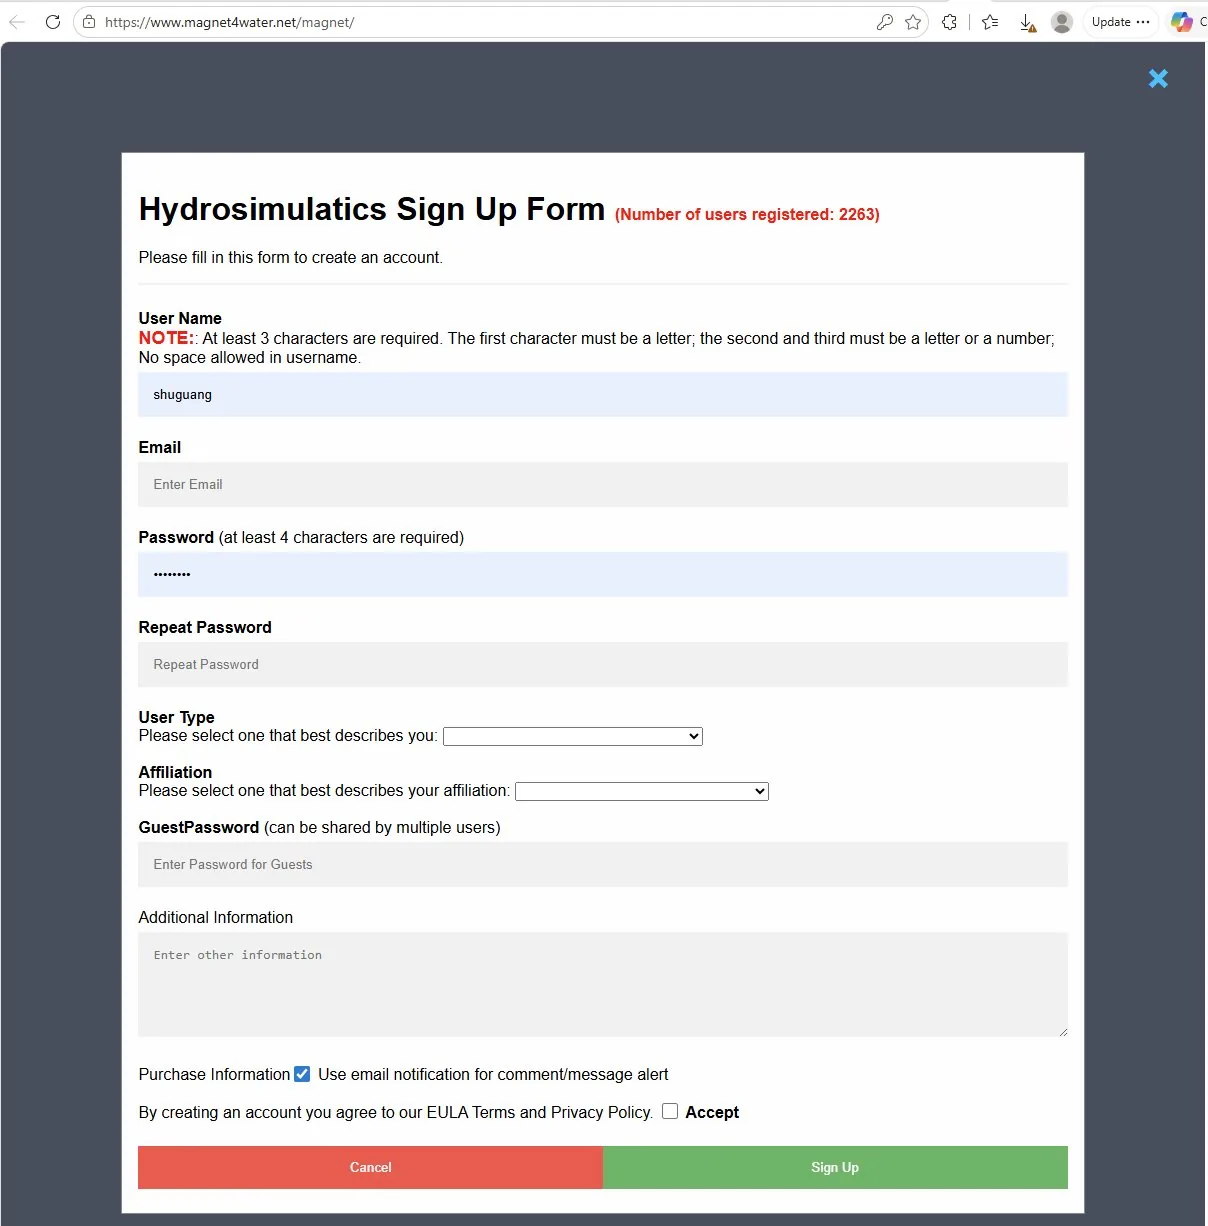
Fill in the registration form
The form asks for your first name, last name, email, password, and organization. "Organization" means your university, company, agency, or similar affiliation — if none applies, you can write "self" or "independent." No credit card is required for the free tier.
Confirm your email
Check your inbox for a confirmation email from MAGNET4WATER. Click the link to activate your account. If it doesn't arrive within a few minutes, check your spam folder.
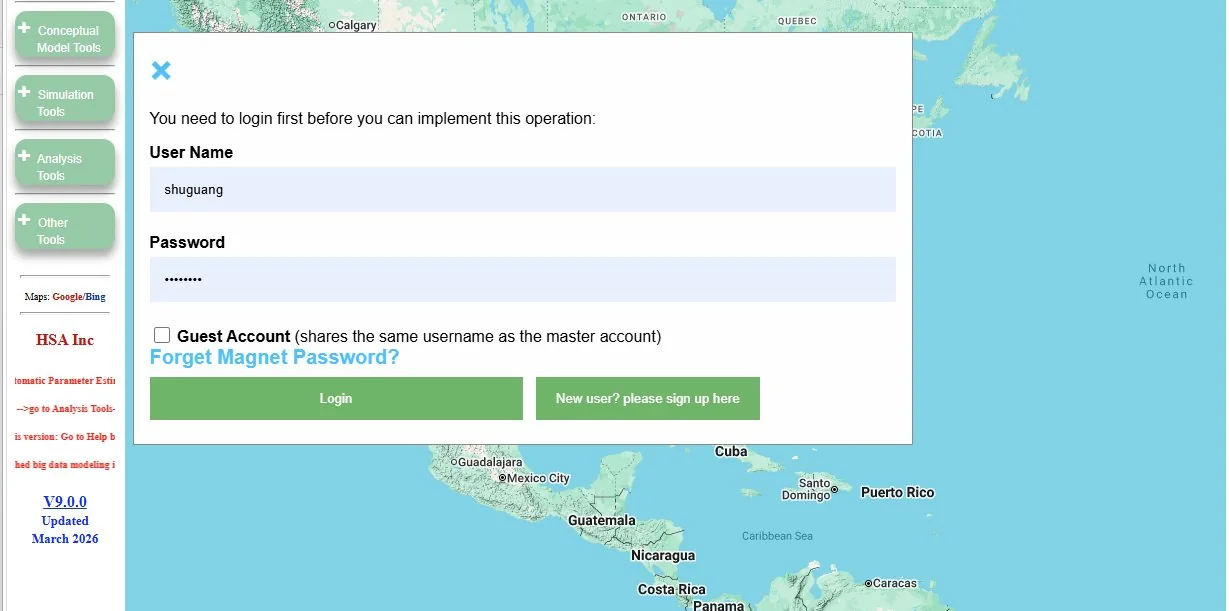
Log in
Return to magnet4water.net and log in with your email and password. You're now ready to use the platform.
If you're teaching a course or running a workshop, students can each create their own free account in minutes. There is no enrollment fee or institutional licensing friction for the free tier. For premium features at scale, see magnet4water.net/Services.
2.2 Logging In and Opening IGW-NET
Once your account exists, opening the IGW-NET modeling environment takes two clicks.
Log in
Go to magnet4water.net. Click Log In in the top-right corner. Enter your email and password. You'll be taken to your account dashboard.
Click Platform
In the top navigation, click Platform. A dropdown (or direct link, depending on your view) will offer IGW-NET among other MAGNET products. Click IGW-NET to open the modeling environment.
Once you know the URL of the IGW-NET environment, bookmark it directly. You can then skip the homepage and dashboard on future visits.
2.3 The Main Interface
IGW-NET's modeling environment has four zones. Learning to recognize them at a glance is the first skill to build.
| Zone | Location | Purpose |
|---|---|---|
| Web map | Center of the screen, occupies most of the visible area | Shows the world (or, once you draw a domain, shows your model). This is where you draw, click, and see your simulation results. |
| Left toolbar | Vertical strip on the left | The four panel groups: Conceptual Model, Simulation, Analysis, File. Every action you take in IGW-NET starts from a button in the toolbar. |
| Top ribbon | Thin horizontal bar above the map | Global settings — base-map selection, units, language, and account-level functions. |
| Quick Helper | Panel on the right-hand side (toggleable) | Context-sensitive help — lists the logical next steps based on what you've done so far. New users should keep this panel open. |
If you ever feel lost in the interface, it's because you're looking somewhere other than the left toolbar. Every workflow — drawing a domain, configuring attributes, running a simulation, viewing results — begins with a toolbar button. When the manual says "click DomainRect," it means "find the Draw Domain button in the toolbar and choose the rectangle variant from its dropdown."
2.4 The Four Toolbar Panels
The left toolbar is organized into four panels corresponding to the four phases of any modeling workflow. Time spent understanding this layout pays back many times over.
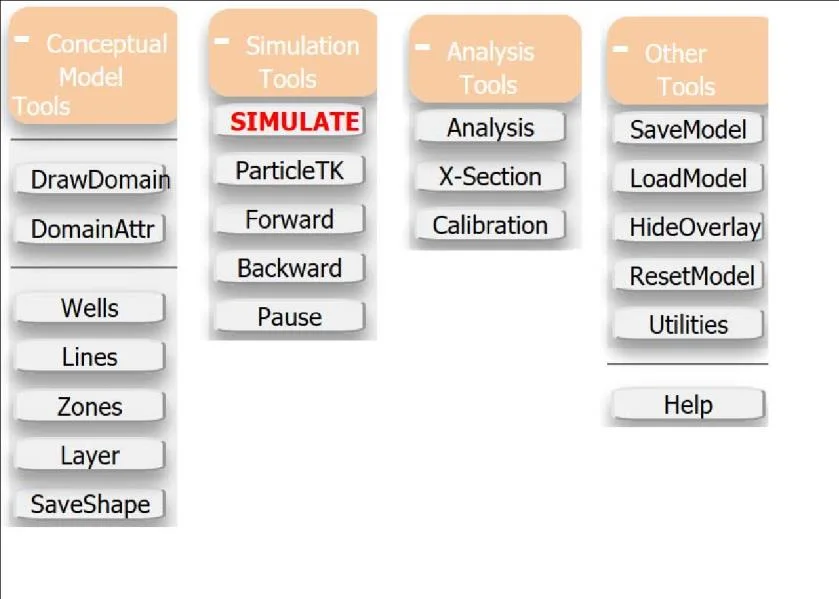
2.4.1 Conceptual Model Tools
This is where you build the physical setup — the geometry and features of your model. Buttons in this panel include:
- Draw Domain — the model boundary (rectangle, polygon, imported file, or shapefile)
- Draw Zone — polygon zones for local refinement, surface-water bodies, submodels
- Draw Polyline — line features for streams, drains, prescribed-head boundaries
- Draw Well — pumping wells, monitoring wells, observation points
- Domain Attributes — the aquifer-attributes dialog (covered in Ch. 5)
- Particle Tools — particle lines, rectangles, and polygons for flow visualization
A typical workflow starts here: draw the domain, then add zones, lines, wells, and particles as your conceptual model requires.
2.4.2 Simulation Tools
This panel controls the solver and the simulation run. Buttons include:
- Simulate — run the model (this is the button you'll click most often)
- Simulation Settings — time stepping, solver selection, grid resolution
- MODFLOW 6 — switch engines for unstructured grids or specialized packages
For the base model — flow, transport if sources exist, particles if particle zones exist — clicking Simulate is all you need. The simulator handles everything automatically.
2.4.3 Analysis Tools
Once your simulation has run, this panel is where you interpret it. Buttons include:
- Cross-Section — draw a line and see the vertical slice through your model
- Analysis — water balance, head charts, concentration breakthrough, 3D views
- Calibration — overlay observed water levels and adjust multipliers to fit
- Statistics — summary metrics about your flow and transport fields
2.4.4 File Tools
For persisting and sharing your work. Buttons include:
- Save Model — save to your MAGNET4WATER account
- Open Model — load a previously saved model
- Download Model — save a model file to your local drive
- Publish Model — share a model publicly on the MAGNET4WATER Observatory
The four panels are in workflow order from top to bottom: build (conceptual model) → run (simulate) → interpret (analyze) → persist (file). Most of your time in the platform will be spent in the first panel; the others take just a click or two.
2.5 Saving, Opening, and Publishing
Three ways your model can exist outside the browser session. Knowing when to use each saves time and prevents lost work.
| Method | What it does | When to use it |
|---|---|---|
| Save Model (to account) | Stores your model on MAGNET4WATER servers, associated with your account. Accessible from any browser where you log in. | Routine saving during a work session. Default choice. |
| Download Model (to local file) | Downloads a text file to your computer containing the complete model definition. Can be re-opened later or shared by email. | Backup, sharing with a colleague, or working offline. |
| Publish Model (to the Observatory) | Adds your model to the public MAGNET4WATER Observatory, where anyone can view, download, and use it as a starting point for their own work. | When you want to share publicly — class assignments, case studies, open-science publication. |
2.5.1 The Observatory — where water intelligence lives
The MAGNET4WATER Observatory is the global network through which water intelligence is made visible. IGW-NET contributes groundwater models to it, but the Observatory is broader than any one platform: it unifies published models from all five MAGNET4WATER platforms (IGW-NET, SwaNET, StormNET, ConduitNET, DataNET), live sensor feeds (USGS national water network), Data Center rasters, and user-contributed observations. The organizing idea: every model is data, every dataset is a model of reality, and the Observatory lets you see the water system using everything available.
Every model you publish to the Observatory comes with a description — structured assumptions, parameter choices, suggested refinements — automatically generated from the model file by the platform's parser. This is the Intelligent Reporting System at work (see Ch. 1 §1.5). When you publish, others can learn from your work; when you browse, you can learn from theirs.
Before you build a model of a new site, check the Observatory — someone may have already published a model covering your area of interest. Starting from an existing Observatory model is often faster than starting from scratch, because the domain, Data Center selections, and refinements are already in place. The Observatory turns the sum of the community's modeling work into a starting point for new work.
Where to go next
- Chapter 3 — Your First Model in Ten Minutes — with your account in place, build your first working model. This is the chapter where everything comes together.
- Chapter 5 — Aquifer Attributes — the conceptual heart of modeling in IGW-NET. Essential reading before you start refining your base model.
- Quick Tutorial 1: 2D Steady Flow — the hands-on alternative to Ch. 3 if you prefer a shorter walkthrough.
- Realtime-Help Reference — for the moment you need to know exactly what a specific button does. Accessible from within the platform.